This post brought to you by Dollar General. The content and opinions expressed below are that of Babysavers.
You know how you can have a small part of your house in disarray and it bothers you for a while, but then you stop seeing it? How it somehow just ends up blending into everything else and you eventually forget about it?
Ok, maybe it’s just me. If I’m being completely honest, I know that if my mother reads this article she’ll probably raise her eyebrows and think, No. I don’t have that problem.
But that’s beside the point. I can’t be the only one with this issue!
One problem spot like that for me was my jewelry box. This is what it looked like for a very long time:
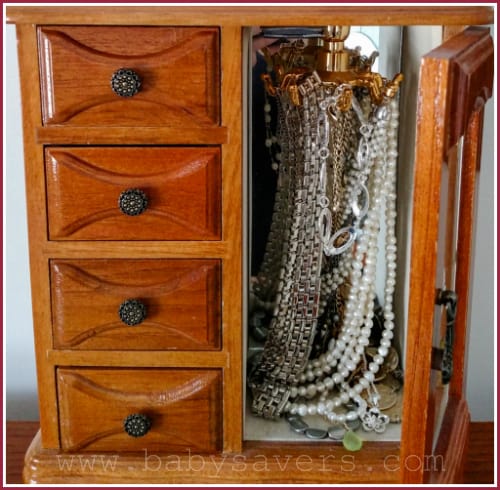
The worst part was that I kept adding to this disaster of necklaces, bracelets and earrings!
Obviously, this little box wasn’t going to sustain my growing collection, and it was time for a solution.
Since there’s a new promotion to Save on home essentials with Dollar General I headed to my local Dollar General to gather all the materials needed to make a DIY hanging jewelry organizer.
Here’s what I bought:

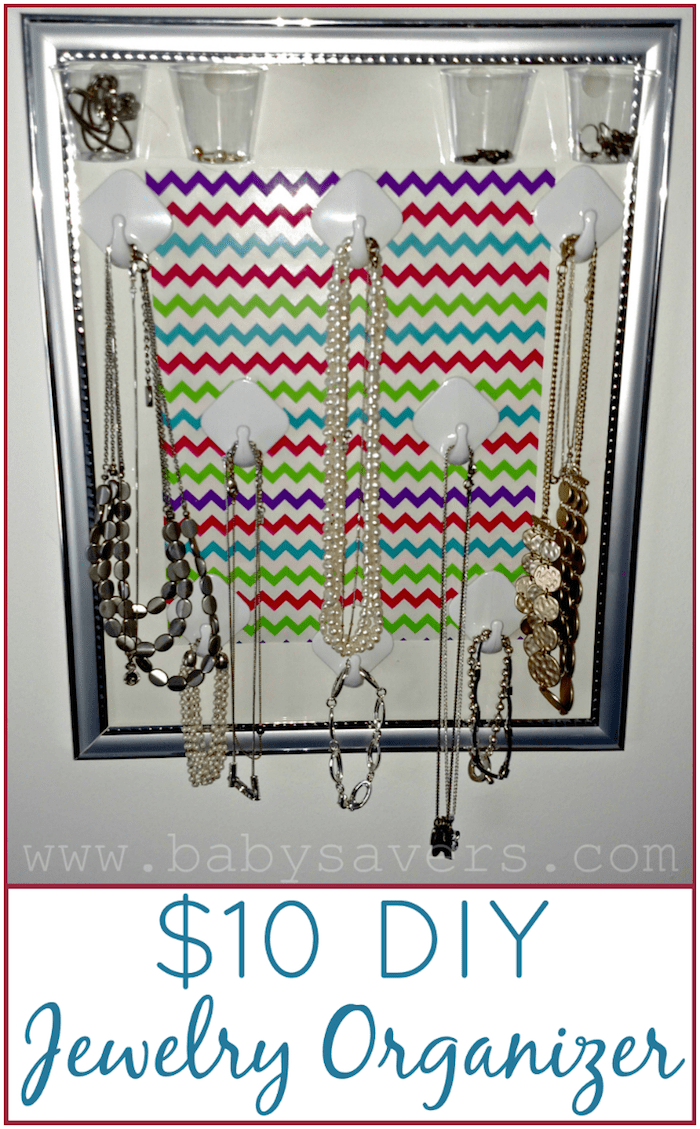
I bought all this at Dollar General for $10! Here’s what I purchased:
- Pretty photo frame with mat included.
- Cute wrapping paper
- Self-adhesive hooks
- Glue (I bought fancy Glue Dots, but any glue, even tape, will work)
- “party cups” Lets call a spade a spade: these are disposable shot glasses! (These didn’t work for me. Read on for details).
How to Make a DIY hanging jewelry organizer:
- Decide which way you want your DIY hanging jewelry organizer to hang. Vertical or horizontal. Keep this in mind as you put it together.
- Remove the backing from the frame. take the pretty stock picture out of the frame. My frame has that pink flower picture in it.
- Wrap the stock picture in your wrapping paper. If your wrapping paper has lines make sure you line it up so it’s squares up nicely with the edges of the picture. Straight is good. Crooked is bad.
- Glue the wrapped picture to the mat.
- Secure the backing to the back of the frame.
- Flip the frame over so the glass side is up. Arrange the adhesive hooks on the frame before you stick them onto the glass. The length of your necklaces should influence the placement of your hooks.
- Stick the hooks on the glass. Done!
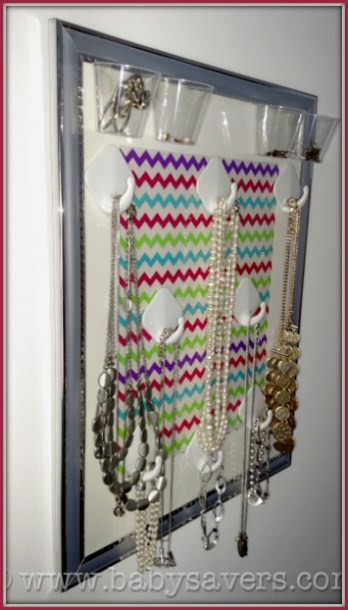
Note: I originally intended to include instructions for arranging the little plastic cups along the top of the frame to hold earrings, rings or other baubles.
As you can see in the pictures, I did do this. Unfortunately, the cups didn’t stay glued on for very long. I had already lost the center cup before I had a chance to take my first picture!
Shortly after hanging my DIY hanging jewelry organizer on the wall, the rest of the cups fell off. One by one. I lost an earring. Moral of the story: use the cups for beverages, as intended!
Once your DIY hanging jewelry organizer is done, you can hang it on the wall with the clips already on back. You could also use the built-in frame stand to display it on a dresser or side table
. As I had already mentioned, all materials came from Dollar General, and the entire project cost less than $10. Even better, it took about 10 minutes to put it all together!
Save on home essentials with Dollar General!
Leave a Reply