This simple tutorial will show you how to cover a lampshade with fabric to give it a whole new look and feel!
Good bones. I can’t believe I just wrote that without making a joke. The truth is, I use that phrase all the time (confession: I also giggle a little bit when I say it).
Why do I say it? Because remaking, re-doing, upcycling and refurbishing are my jam. And items with good bones are the bread and butter for those projects.
Now I’m adding a lot of snack terms to my explanation, and I can tell it’s not going to keep you around.
Related: How to make a DIY Moby Wrap and How to bleach dye a shirt.
So, lets get to the story of how I came upon the table lamp that needed an update, and what I did to give it a unique lamp makeover.

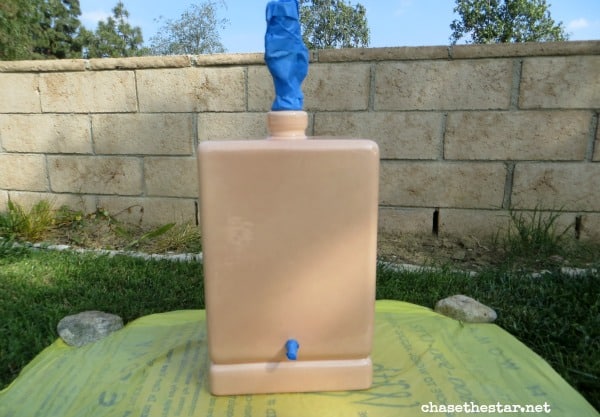
I was at one of my favorite thrifting places and I found an interesting lamp that absolutely had good bones. I loved the lines of the lampshade the the shape of the base.
At the same time, I hated that glossy terra cotta color and the dinginess of the shade. I knew it wouldn’t take much to give this lamp a new look, so I took it home.
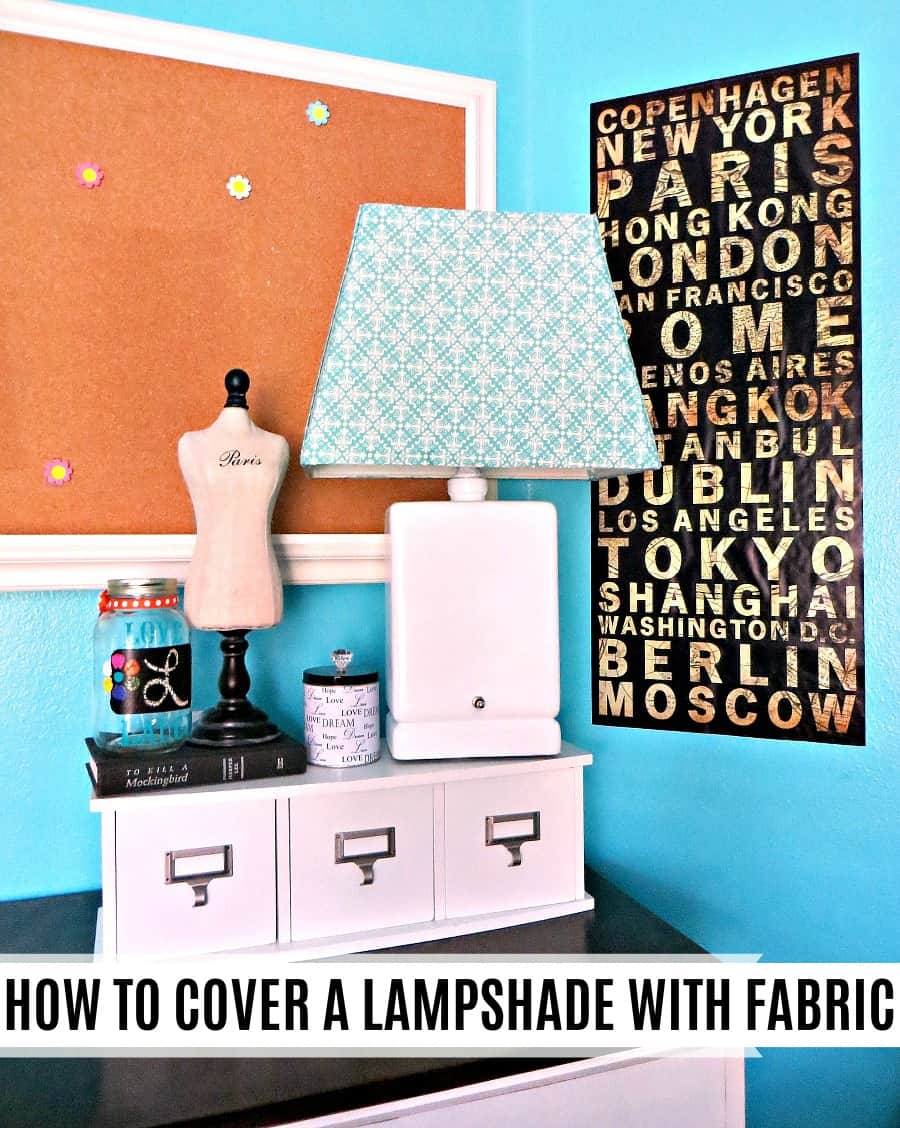
Here’s the lamp after the makeover:
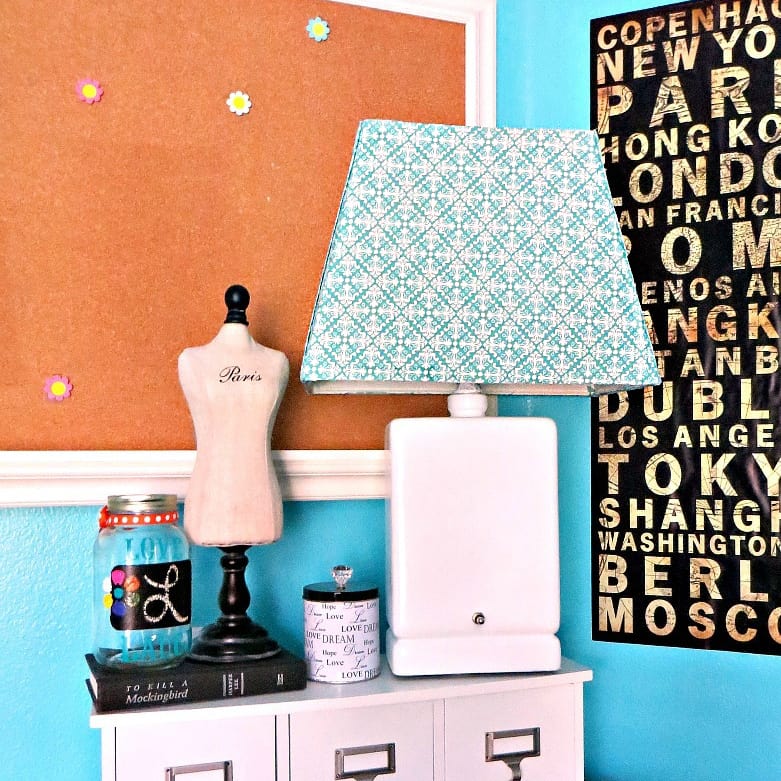
I was going to try to come up with something super creative and outside the box, but then I decided that a simple and pretty makeover would work best.
The lamp is for my daughter’s room which needed some additional task lighting.
This lamp is already uncommon in it’s wide, rectangular shape, so it’s interesting enough interest on its own. I do, however, reserve the right to change my mind and go crazy creative later!
It was a simple makeover. I promise, anyone can do this. It took me about an hour of work from start to finish.
How to paint a lamp base
Get ready to be surprised at how easy it was to cover up that pinkish-brown terra cotta color!
Materials for spray painting a lamp
You only need two things to paint your lamp:
- Blue painter’s tape
- Spray paint in your choice of color
I used this glossy white spray paint (I think it’s the best) to keep the base neutral.
Directions for spray painting a lamp
- Remove the shade.
- Tape off the metal parts.
- Tape up the cord if it can’t be tucked away. This lamp base was hollow, so I just tucked the cord into it.
- Spray the lamp lightly with spray paint in short horizontal stokes.
- Repeat until you can’t see a trace of the old color and the new color is even.
How to cover a lampshade with fabric
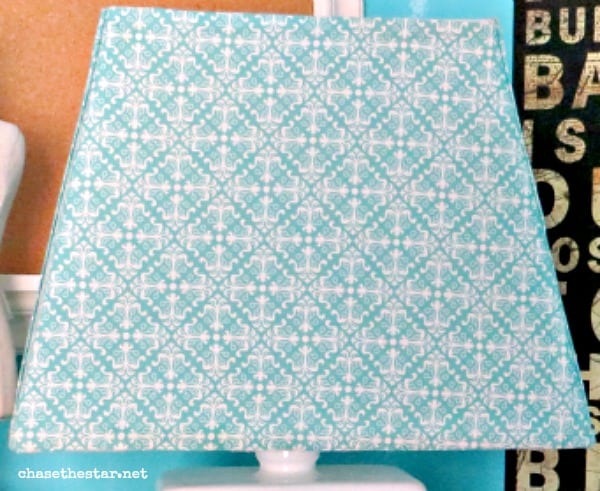
Covering the shade was also easy. The shade wasn’t a typical slanted drum shape, which actually made it easier to cover.
How I did it
First, I purchased a 1/2 yard of beautiful blue and white fabric for $3 from Jo-Ann and cut it into 4 pieces to match the four sides of the shade. I made them about 1/4 inch longer than the shade itself.
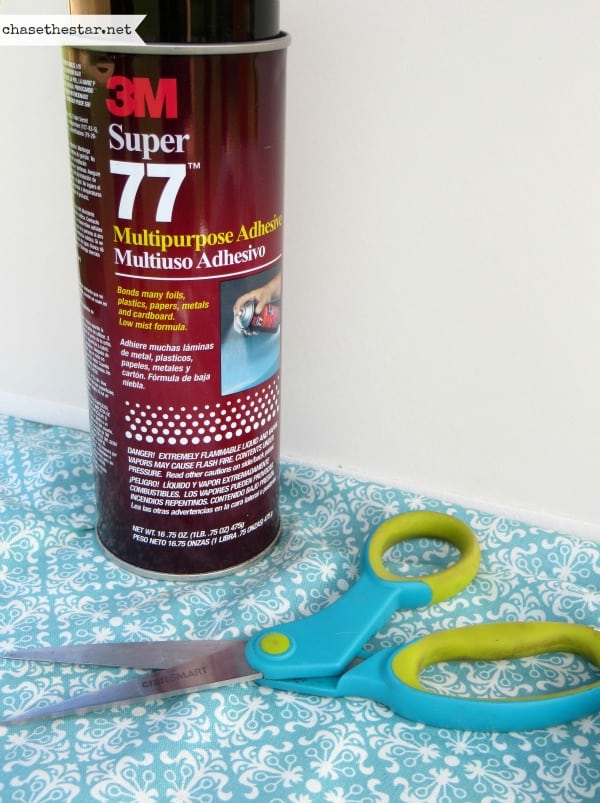
I sprayed my favorite spray adhesive to one of the shade. Then, I placed the fabric piece on it, pressing down firmly with my palms. Finally, I tucked the extra 1/4″ length under the edges of the lampshade.
The lamp sits on her desk, which was also a thrift store find. Boy, you’d think I never buy anything new! It’s not true, but I do love a good fixer-upper.
I’m so pleased with how this pretty this thrift store lamp turned out! I especially love how simple and fast it was to makeover. It took about an hour, not including dry time.
It’s so fun to give something unwanted a whole new life in such a a short amount of time!
Leave a Reply